
Corridors and Staircase Landing
Light switches are located in each floor’s electrical room (wings are labelled sinistra or sx, and destra or dx).
CORRIDORS
- There are two sets of lights in each corridor from the first to the third floors:
- “ORDINARIA”: the four LED bulbs at the center of each wing, which are used ordinarily. These are connected to the movement sensors in the corridor ceilings (explained below).
- “NOTTURNA”: the continuous lights at the edges of the corridor ceilings. These are connected to the CREPUSCOLARE switches (explained below).
- FOR OUR PURPOSES, THE NOTTURNA ARE ALWAYS SWITCHED OFF, but may be manually switched on anytime.
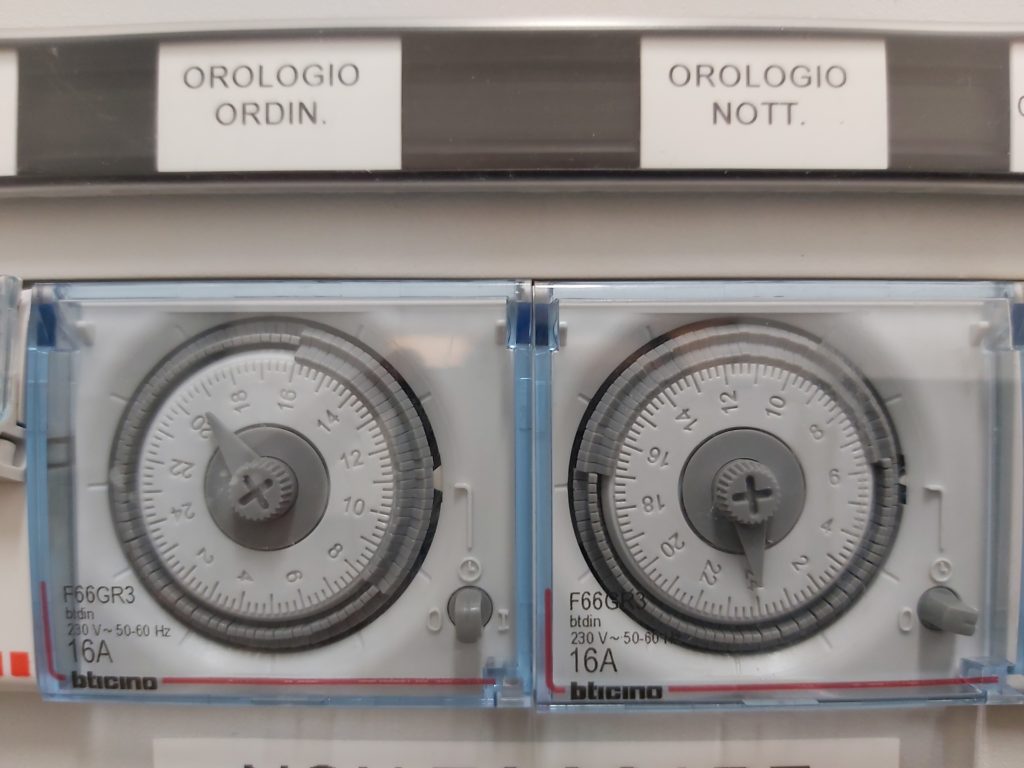
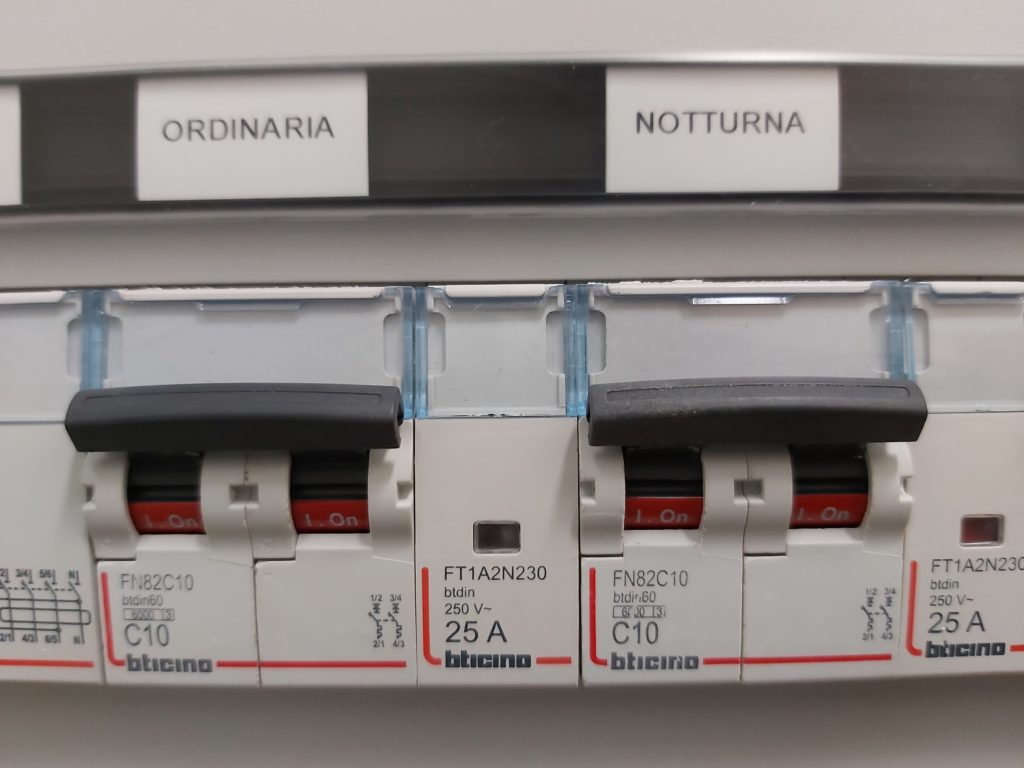
- “ORDINARIA” and “NOTTURNA” sets each have:
- a MAIN SWITCH with ON (up) and OFF (down) setting;
- an OROLOGIO switch with clock timer switch with three positions: “1” (on), round “clock icon” (automatic, which follows the clock), and “0” (off);
- for 2nd and 3rd floors only: a MAN(UAL) / AUTO(MATIC) slide switch, to manually set on or to automatically follow clock schedules; and,
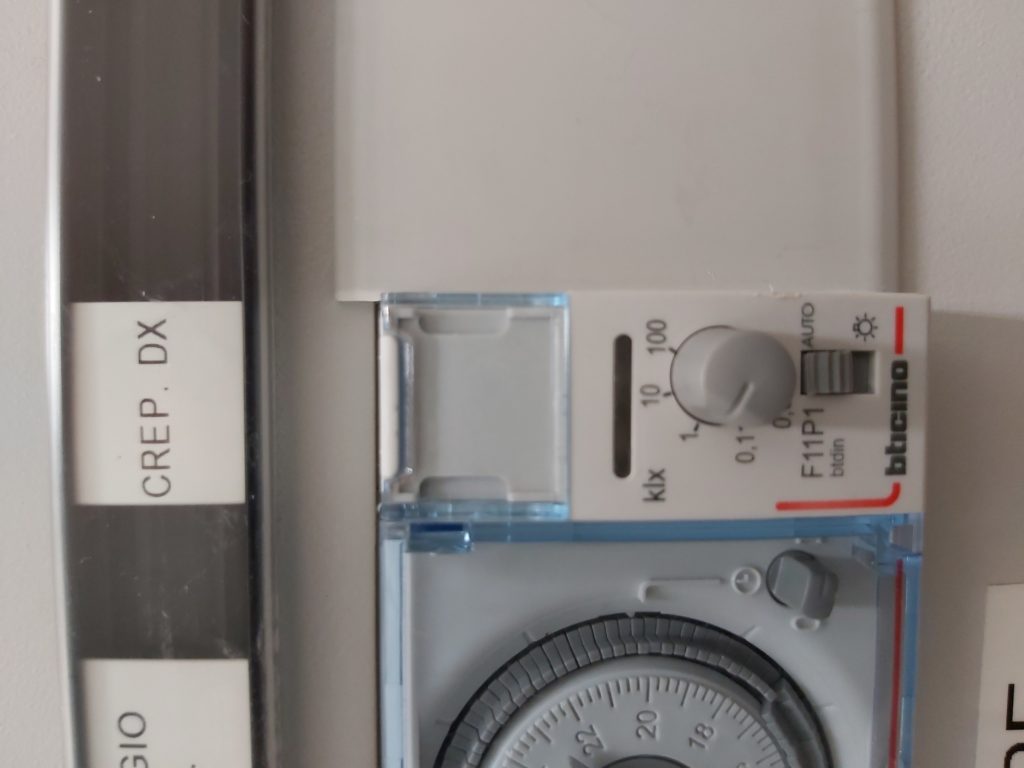
- for NOTTURNA only: a CREPUSCOLARE switch that depends on ambient light.
- The ORDINARIA in addition are switched on by the movement sensors fixed at the corridor ceilings. In normal situations:
- Set MAIN SWITCH UP (on). NOTE: on the third floor, the balcony lights outside (at the end of each wing) are also controlled by this MAIN SWITCH.
- Put OROLOGIO to “A(UTOMATIC)” or the “CLOCK ICON”, then set time that the lights should switch on when movement is detected (more or less 30 minutes before sunset, until 30 minutes after sunrise; make sure the OROLOGIO clock indicates the correct time).
- Or put OROLOGIO to “1” (ON) if the ORDINARIA should always switch on whenever movement is detected regardless of time of day.
- Or put OROLOGIO to “0” (OFF) if the ORDINARIA should never light.
- for 2nd and 3rd floors (none in 1st floor): always slide the MAN(UAL) / AUTO(MATIC) switch to: AUTO
- The NOTTURNA have in addition a “CREPUSCOLARE” switch, activated by ambient light level.
- A good setting is at 40.
- For the 1st and 2nd floors: put MAIN SWITCH DOWN (off) and OROLOGIO to “1”. This is because the NOTTURNA are not normally used, but could be switch on as needed (when cleaning corridors, etc.).
- Since the NOTTURNA is not used, the CREPUSCOLARE switch should be set to “AUTO” or “ON” (on all the time, that is, regardless of the light level) rather than “LIGHT ICON” (depends on light level), so it can be switched on anytime by the MAIN SWITCH.
- NOTE: The left and right wings have separate sets for NOTTURNA on the first floor, but are together in the same switch on the second (indicated as “sx /dx” together) and third floors (only “LUCE NOTTURNA” indicated, without sx or dx).
- NOTE: the NOTTURNE at the beginning were actually designed to be the ORDINARIE (that is, used in ordinary situations); but since they are not really that necessary at the current setup, they are now switched off all the time.

STAIRCASE LANDING
The SCALE (lampade scale, or lights at the staircase landing, not at the staircase itself) have an on and off switch. They also have their own light sensors switch in the cabina: Manual means on all the time, and Automatic means on when sensors detect movement.
When set to Automatic (movement detection), the SCALE lights follow the OROLOGIO schedule of the ORDINARIE (above): hence they can be activated by movement within the set schedule when the OROLOGIO is set to “A”, or anytime when set to “1”.
STAIRCASE LIGHTS
On the other hand, all the lights of the staircase itself (not the landing) have a single switch in the portineria, also with its own crepuscolare.
Adjust the CREPUSCOLARE level as desired. Wait a few minutes before the desired setting switches the lights on or off as desired. It is necessary to observe the settings a few days until they are finally fine tuned. A good setting could be 40.